Sometimes you just need to do some face recognition and you don’t want to go through the hassle of developing a deep learning model, training it on thousands upon thousands of faces and tuning its hyper-parameters until it somewhat works.
Sometimes you just need face recognition, right now.
And I’ll show you the quickest way to add face recognition to your project, which works, surprsingly - really well.
Requirements
First, we’ll need to install this repository: https://github.com/ageitgey/face_recognition.
To do that, make sure you install dlib according to this instructions.
Then simply run pip3 install face_recognition (or pip2 if you’re using Python 2).
Locating faces
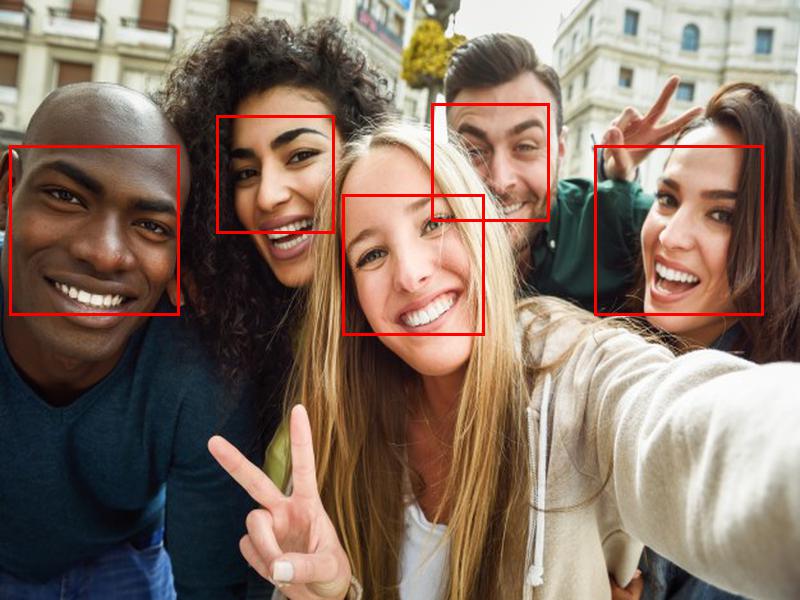
Let’s take this image for example:

Let’s load the image using Pillow in Python:
from PIL import Image

img = Image.open('group_selfie.jpg')
img = img.resize((800, 600), Image.ANTIALIAS)
img = img.convert('RGB')
img.show()
We resize our image to 800x600 to make the face recognition faster without affecting accuracy at all.
Let’s get the face locations in the image using the face_recognition lib we installed above - should take around 2 seconds:
import numpy as np
import face_recognition

data = np.array(img)
locations = face_recognition.face_locations(data)
print(locations)
If you want to get the faces from multiple images at once, use batch_face_locations(images), it’s way faster than iterating the images and calling face_locations(image) on each image separately.
The locations value should look like this:
[(180, 510, 366, 324),
 (98, 356, 253, 201),
 (160, 180, 345, 0),
 (168, 741, 297, 612),
 (110, 569, 239, 440)]
We can see it recognizes 4 faces, each tuple is the rectangle coordinates of a face in the form of top, right, bottom, left.
print(len(locations)) # prints: 4
Practical applications
Lets use those rectangle coordinates of each face to actually draw a rectangle in those coordinates for each face.
from PIL import ImageDraw

# We copy the image since we don't want to draw on the original image.
img_copy = img.copy()

draw = ImageDraw.Draw(img_copy)
for location in locations:
    top, right, bottom, left = location
    draw.rectangle(((left, top), (right, bottom)), outline=(255, 0, 0), width=3)
del(draw)
img_copy.show()
This should result in an image like this:
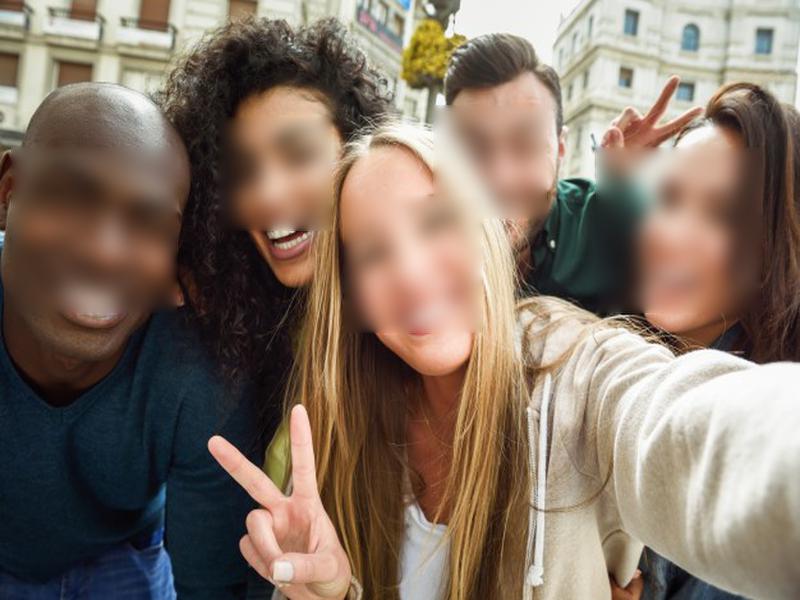
A common application for face recognition is to blur faces, so let’s do that:
# We copy the image since we don't want to draw on the original image.
img_copy = img.copy()

for location in locations:
    top, right, bottom, left = location
    crop = (left, top, right, bottom)
    buffer_crop = img_copy.crop(crop)
    # blur multiple times for a bolder blur
    for _ in range(30):
        buffer_crop = buffer_crop.filter(ImageFilter.BLUR)
    img_copy.paste(buffer_crop, crop)
img_copy.show()
This should result in an image like this:
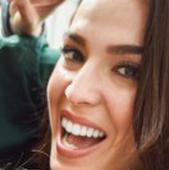
Another common application is to get a crop of each face, so let’s do that:
for index, location in enumerate(locations):
    top, right, bottom, left = location
    crop = (left, top, right, bottom)
    face = img.crop(crop)
    face.show()
This should result in images like this:


This concludes the post for face recognition, in the next posts I’ll explain:
- How to compare faces (check if a face is of someone).
- Gender classification.
- Locating facial features (eyes, mouth, nose, tongue, ears, hair and such…).
- Sentiment analysis.
But until next time, happy hacking.